A thorough understanding and practical application of neutral buoyancy is the most important skill for safe and enjoyable diving. What are the key factors influencing buoyancy control, and how can you improve your buoyancy skills?
Many different things factor into perfect buoyancy, each going hand-in-hand. If you are lacking in one area, your overall buoyancy and comfort underwater will be affected. This comprehensive guide is split over 4 parts, each deep-diving into the key elements to improve your buoyancy control: breathing control; weighting; use of the BCD; trim and finning techniques.
We recommend reading all parts of this series to see if you are aware of – and using – these points to improve your buoyancy, even if you think you may have mastered certain elements.
You’ve seen those divers who can get close to the bottom without touching a thing. The ones who can go backwards and turn on the spot using only their fins. Those divers who make it look easy! This is more than just great buoyancy, this is full body control. Now that you have gained more understanding of breathing control, ideal weighting and proper BCD use to improve your buoyancy, it’s time to put everything together and focus on trim and finning techniques.
What is the optimum scuba diving trim?
Ideal trim is horizontal, with an almost-straight line from the shoulders all the way down to the knees. This position is most streamlined in the water, reducing drag and conserving energy. There should be an angle at the knees and ankles of around 90 degrees. Raising your fins above your body in this orientation enables you to have more control of your body and movements, more stability when hovering and you are less likely to kick the reef and sand below you when you are finning.
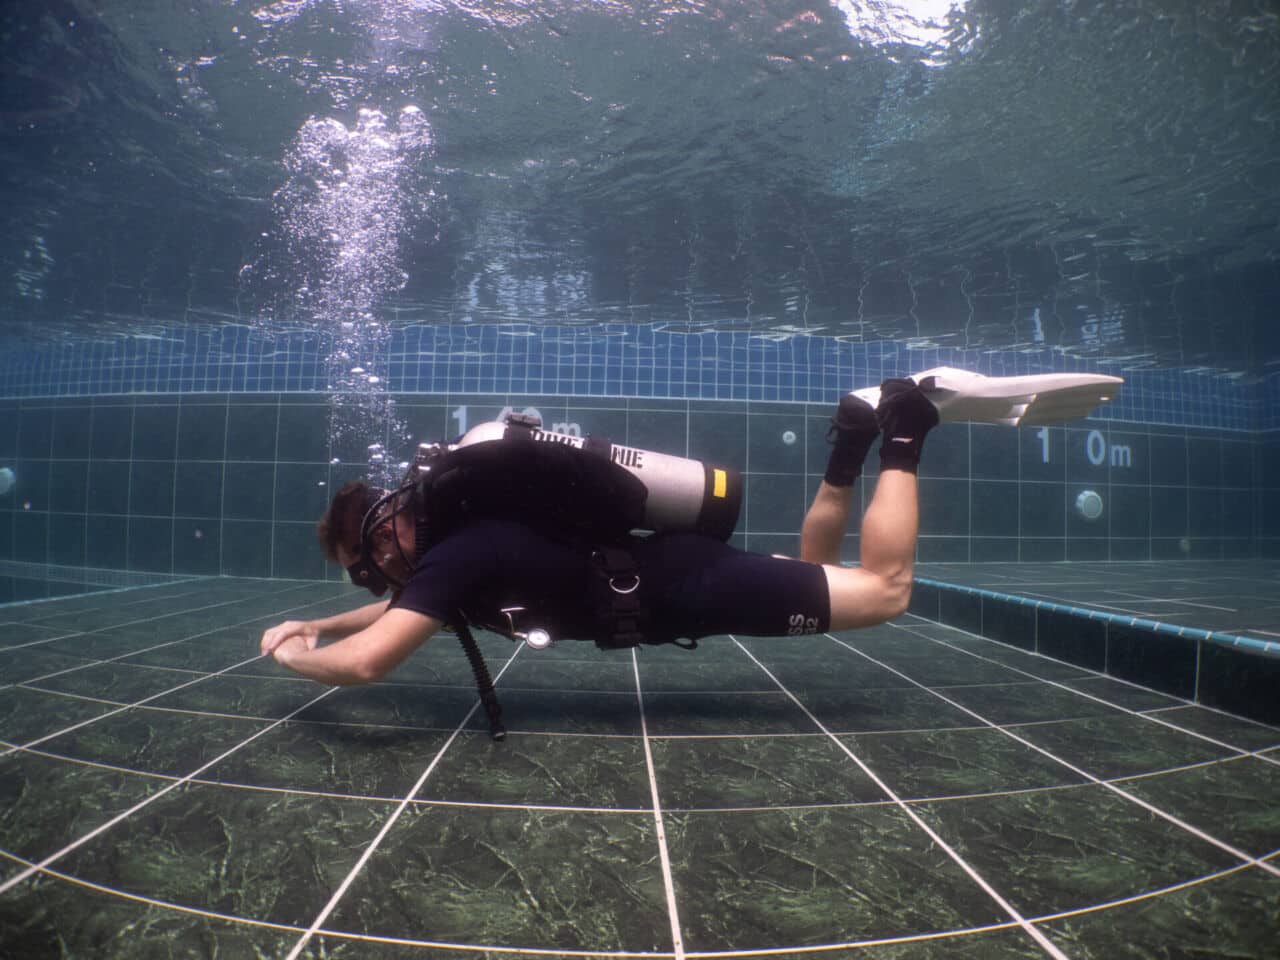
Arms should be stretched out in front of your body to aid your centre of gravity and increase streamlining. Holding your hands together, or wrists, whichever is comfortable for you, will also encourage less hand movements. As explained below, all movements underwater, including turns and back finning, can be achieved solely and much more efficiently with your fins. Having full control of your position with your fins allows you to keep your hands available for communicating, holding cameras and torches, and even emergency situations. Control using fins is almost impossible from a consistent fully-horizontal position from shoulder to fin-tip.
Disclaimer: There is no ‘perfect’ trim position. The best position for you is the one that you find most comfortable and relaxing, whilst avoiding contact with the reef and conserving energy and air. However, bear in mind that the process of learning new skills will be uncomfortable at the beginning!
How do you achieve horizontal trim?
If you haven’t been taught this trim – including knee and ankle angles – from your open water course, it will take some effort to break your old habits and learn to use a new set of muscle groups.
The first step is using your glute and hamstring muscles to lift your upper legs in line with your upper body. Try not to drop your knees far below your hips (if at all), even whilst flutter kicking and definitely not whilst frog kicking. Use your lower back muscles to aid your glutes with this lift with a very, very slight arch of the back upwards. The same muscles are used to sit up straight in a chair. Hunching your back underwater will encourage you to drop your knees. Do not arch your back or pull your your legs up too much – stay flat through your hips and knees.
Let’s practice!
You can practice this position before you entering the water – something I always do with my students – to give you a feeling of how true horizontal orientation should feel underwater.
Find a flat and somewhat firm surface, like a bed or a carpet or rug on the floor, and lay in a horizontal position on your front with straight legs. Now, bend your knees to around 90 degrees, pointing your toes towards the ceiling. And now flex your ankles, so your feet (eventually fins) are laying horizontal and perpendicular to your upper body. Stretch your arms in front of you, holding your hands gently together or fists close to one another.
As you are beginning to learn this new trim, maintaining this flex in the ankle throughout the dive is a great way to encourage a natural bend at the knee.
It is helpful to use a mirror or ask a partner/friend to help you assess your position in reference to a picture of a diver in good trim. You can even practise the position underwater at the bottom of a pool or flat sandy patch during a dive (not on the reef!). Lay down just like you did when practising before the dive.
What can make horizontal trim more difficult to achieve?
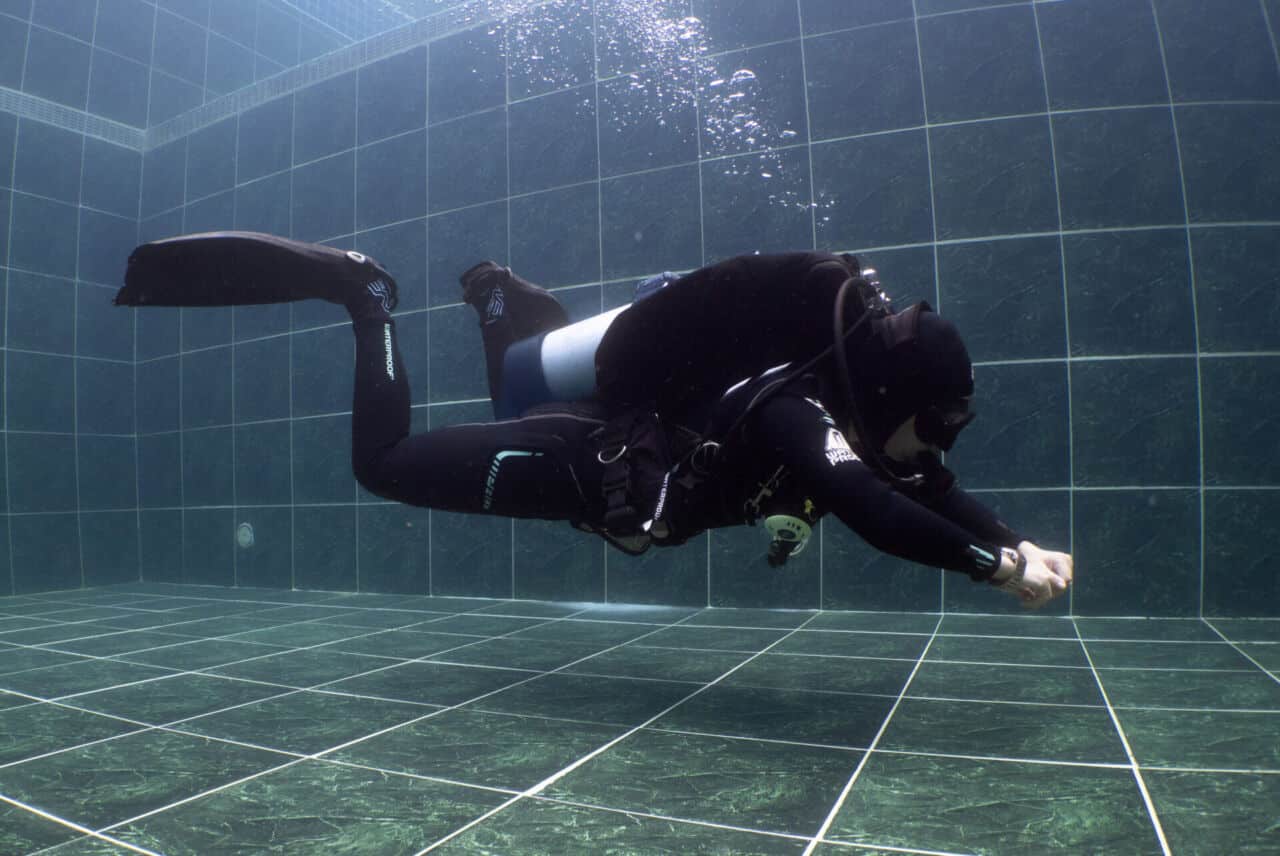
Overweighting:
Carrying too many weights than necessary for you will drag your lower body down, especially if you are carrying the weights on your lower hips – more typical for men. To compensate for being too heavy, more air must be added to the BCD to aid in achieving neutral buoyancy as explained in Improve your Buoyancy: Part 3. More air in the BCD, which is located on your upper body, will pull your upper body upwards further exacerbating this imbalance in your center of gravity as you can see in the image. More air in the BCD also leads to more instability as the larger volume of air moves around inside the bladder.

Breathing:
As we learned in part 1, your breathing depth and rate plays a significant role in your buoyancy, but also your trim. Your lungs are located in your upper body. Deep breathing will rise your upper body upwards, as well as requiring more weights. It all works together. Relax your breathing to a lower capacity, reduce your weights and volume of air used in your BCD, and wallah, your trim is significantly improved already.
Weight distribution:
Every diver has a different body composition. Muscle weighs more than fat, and muscly legs could also be weighing your body down. Play around with your weight distribution after finding your ideal weights. Try moving your weight system further up your torso to balance your centre of gravity. Trim pockets on your tank and adjusting the position of your tank on your back can also help. If you have ‘floaty’ legs, try negatively buoyant fins or small ankle weights.
Finning techniques
Fins are a useful extension of our feet – ensure that for any kick technique you use, you are extending the kick through your toes and fin-tips for maximum propulsion. The modified flutter and frog kicks should be paired with an immediate pause after propulsion for gliding and returning to hovering between kicks to conserve energy and reduce air consumption.
Flutter kick:
Most divers will begin with the classic straight-leg flutter kick. This is an easy introduction but often encourages constant kicking as this position is not stable for hovering. When done correctly, flutter kicking is ideal for strong currents and to get somewhere fast, like catching up with your buddy or group if you have fallen behind, distracted by something. (always have awareness) Flutter kicking is not ideal to be used close to sand or corals, as the water will be propelled up and down instead of directly behind you.
See how to use flutter kicks efficiently here. A lot of beginner divers do not have an efficient flutter kick with straight legs. They will either ‘bicycle kick’ with the heels of their feet and not use their fins, or constantly kick with little force as they cannot hover due to poor buoyancy and stability.
Once you have worked on your hovering trim, you can progress into more effective and relaxing fin techniques. The following techniques are used by recreational divers as well as cave and technical divers due to their higher energy conservation, accuracy and minimised bottom (sand, silt and corals) disturbance.
Frog kick:
The most tricky kick to master. Begin in hovering trim and bring your knees apart from each other, maintaining the bend at the knee and ankle flex. Flex your fins outwards, and kick them around and together, touching the underside of the fins (soles of your feet) together at the end of the kick. Keep a slight bend in the knees throughout to avoid an upwards propulsion. Glide and then return to hover position. Watch an instructional demonstration here.
Note: Unlike the breast stroke kick used in swimming, do NOT bring your knees down and into your chest – keep your upper legs in line with your upper body and fins elevated. In addition, do not force the kick through your heels – direct the kick all the way through to your fin tips for maximum propulsion.
Using your fins for movement control
Our fins are a very useful extension of our feet. Learning how to use them efficiently, and in different ways, can greatly improve your manoeuvrability and control underwater. Instead of using your hands for position control, you can learn to use your fins much more effectively.
Back finning
Back finning is a technique used to fin backwards underwater. This skill is undoubtfully useful when diving in areas with limited space, like caves, but it can also be used in recreational diving. Learning how to fin backwards can help you in many situations whilst you are diving: you will be able to get closer to the reef to investigate marine life, trusting your skills to manoeuvre backwards away from the reef; and you can effortlessly alter your positioning when taking underwater photos or videos without having to use your hands.
Back finning is a difficult skill to learn. The angle of your legs and fins are vital to achieve the desired movement. Have a look at our demonstration video below and search for more videos on YouTube to develop your understanding. Here is a great instructional video.
Helicopter turn
Helicopter turn is a technique of turning on-the-spot. Also used in cave diving, this skill is useful for turning in limited space. It can be used to change direction, to look around at marine life or your buddy without compromising trim, and to help you if you get too close to the reef. Take a look at our demonstration video below and search for more videos on YouTube. Here is a great instructional video.
Research and practice
Improve your buoyancy and finning techniques with our experienced instructors by joining a RAID Explorer 30 course on board our DiveRACE trips! If you are unable to schedule a course with an experienced instructor, self-teaching is a great skill in the meantime. Research trim, finning techniques, back finning and helicopter turning on YouTube (there are plenty of great videos!) and self-analyse as you practice on land and underwater. You can also ask a buddy to video you video you whilst you are diving!
This brings us to the end of our comprehensive 4-part-guide to improve your buoyancy. We hope that you have gained more understanding about your buoyancy and trim, and will continue to use each dive to further your skills and comfort underwater!
Read more
- Thailand’s Sunscreen Ban: What You Need to Know to Avoid the 100,000 THB Fine
- Corals in Thailand: How You Can Help with DiveRACE
- Dive With Us in The Similan Islands: #7 Koh Bon
- Climate Change & Corals: How Extreme Weather and Warming Seas Shape Our Reefs
- Dive With Us in The Similan Islands: #6 Christmas Point
Related Articles
-

Improve your Buoyancy: A Comprehensive Guide – Part 1
A thorough understanding and practical application of buoyancy is crucial for safe…
-

Improve your Buoyancy: Part 2 – Weights
A thorough understanding and practical application of neutral buoyancy is the most…
-

Improve your Buoyancy: Part 3 – BCD Use
A thorough understanding and practical application of neutral buoyancy is the most…
